Tuesday, October 1, 2013

Coriander and Cumin-Crusted Pork Tenderloin with Parsnips

Pork tenderloin is a wonderful cut of meat, especially as leftovers.  Even after reheating, the meat stays moist and tender.  The flavors in this dish are simple but very satisfying.  It's one of the few dishes I make that require little prep and active cooking time.  This meal is also a great way to introduce a new vegetable to your family - parsnips.  A relatively neutral root vegetable, parsnips are a great carrier of flavors.  My favorite element of this dish is the orange segments.  After cooking with the pork and parsnips, their sweetness is replaced by a savory note and has a great complementary texture.  This recipe is straight out the cookbook, Practical Paleo - a great resource for anybody new to the diet.


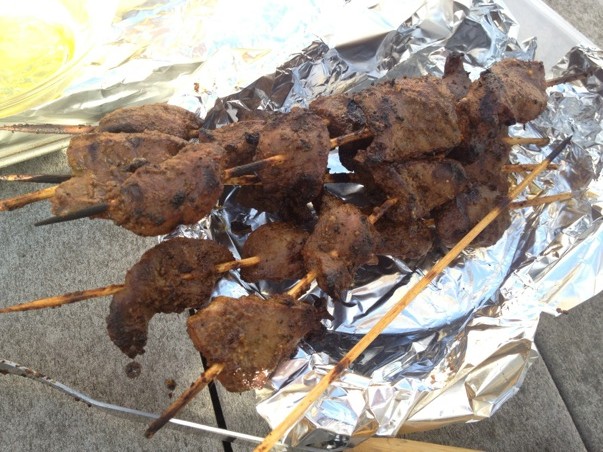
Just look at that perfectly browned spice crust

Prep time: 15 minutes

Active cooking time: 10 minutes
Inactive cooking time: 1 hour

Equipment needed:

large skillet
13x9 roasting pan

Ingredients:

1 tbsp cumin
1 tbsp coriander
1 tbsp garlic powder
1 tsp sea salt
pepper to taste
2 pork tenderloins
2 tbsp cooking fat
2 onions, sliced
4 parsnips, peeled and chopped
2 cloves garlic, minced
1 large orange, peeled and segmented
seeds of 1 pomegranate (approx. 1/4 cup)


Veggies, post-roast

Directions:

1. Preheat oven to 375°.
2. Combine all spices in a small bowl.
3. Pat pork tenderloins dry using paper towels and apply spice blend liberally to all sides.
4. Heat cooking fat in large skillet over medium-high heat and sear the tenderloins on all sides (approx. 2-3 minutes per side).
5. Add the onions, parsnips, orange segments and pomegranate seeds to the roasting pan and top with the seared tenderloins.  Cook in the oven for 30-40 minutes (when the internal temperature of the pork reaches 145°).  Remove the tenderloins and rest them, covered in foil.  Continue to cook the vegetables for another 10-15 minutes.
6. Slice the pork diagonally (on the bias) and serve with the vegetables.


Ta-da!

Happy nomming!

Sunday, July 21, 2013

Primal Chocolate Chip Cookies

I miss cookies.  I was never much of a cake person, but I STILL always find it nearly impossible to turn down a good-looking cookie.  I tried several different paleo cookie recipes before finally finding the perfect cookie for me.  I think the trouble I was having with all of the paleo cookies I was making was the fact that they were all TRYING to be regular, wheat-laden cookies - trying to replicate the texture and sponginess of a traditional cookie.  The recipe that finally convinced me that paleo could make a good cookie was from Mark Sisson.  The trick is that it's not a paleo cookie - it's a paleo VERSION of a cookie.  It embraces the crunch of the nuts that form the cookie's base and doesn't try to replicate the texture of gluten (which, honestly, can't really be done to any satisfying degree).  Based in the toasted flavor of walnuts and pecans, and topped off with the deep, unique flavor of dark chocolate, this cookie is hugely satisfying and a lot more nutritious (and filling!) than a traditional cookie.

Cookware:
1 cookie sheet
1 food processor

Ingredients:
4 dates, pitted
1 1/2 cup walnuts
1/2 cup pecans
1 tsp baking soda
1/8 tsp salt
2 tbsp coconut oil, melted
1 egg
1 tsp vanilla
1/4 cup unsweetened shredded coconut
1/2 cup (or less) dark chocolate chips

Directions:
1. Preheat your oven to 350°.
2. Process dates in your food processor until a paste forms (about 40 seconds).
3. Add walnuts and pecans and process for another 35 seconds (I go a little longer to chop the nuts a little finer - I prefer the finer texture as the base but I've thoroughly enjoyed them both ways)
4. Add baking soda and salt and pulse a few times.
5. With processor running, drizzle in liquified coconut oil, egg and vanilla.  Stop the processor as soon as everything is incorporated.
6. Remove batter to large mixing bowl.  Stir in shredded coconut and chocolate chips (using a big spoon or your hands).
7. Portion out 12 cookies and flatten slightly (you may also want to round out the cracked edges of the cookies)
8. Bake for 15 minutes or until the edges are browned.


Now, if you'll excuse me, I'm off to whip up a batch of these right now - because just writing about them has given me a serious hankerin'.  Happy baking!

Ginger Carrot Soup

I freaking LOVE ginger.  I'm sure that's no surprise to you, considering so many of my recipes have ginger front and center (Moroccan Chicken Casserole, Roasted Cashew-Covered Broccoli, Chicken Tikka Masala).  It's a powerhouse spice that I just adore in all forms.  I also sometimes get a little bored chowing down on fibrous veggies all the time - so it's nice to be able to make something OUT OF the vegetables that provides a different texture and mouthfeel to my meal (both important aspects of a satisfying meal, along with flavor and aroma, of course).  It takes a little time, but very little effort, to make this delicious side dish.

Cookware:

stockpot with lid
a blender (or food processor)

Ingredients:

3 tbsp coconut oil
1/2 large yellow onion, diced
1/4 cup fresh ginger, finely chopped*
4 cups carrots, peeled and chopped (approx. 1 1/2 lbs)
3 cups vegetable broth
1 1/2 cups orange juice (freshly squeezed is best; this is what I would call the "secret ingredient" of this soup)
dash nutmeg
salt and pepper, to taste

*My friend who first introduced me to this soup (Hi Renee!!), leaves the thin, papery skin on the ginger when cooking it.  I was completely put off by this but happily admit that the skins did not add any unwanted flavor to the final product and even added a rustic element.  Despite this admission, I still always peel my ginger - 'cause my Mama raised me right.

Directions:
1. Heat the coconut oil in your stockpot over medium high heat.  Add your onions and ginger and saute until onions are soft (about 5 minutes).
2. Add carrots and vegetable broth and reduce heat to medium.  Simmer for about 40 minutes or until carrots are soft.  Add orange juice and remove from heat.
3.  Working in stages, puree the simmered ingredients in your blender.
4.  Stir in nutmeg, salt and pepper and serve.

Crazy simple, right?  And the final result is a wonderfully sweet, (carrot), spicy (ginger) and tart (orange juice) soup that's refreshing and satisfying.  Oh, and just in case anyone was wondering, this recipe is 100% vegan as well.


No picture?!  I suck.

Peruvian Anticuchos

I must admit - one of the most exciting culinary experiences about eating primal is cooking with new proteins - namely offal.  So far, in my kitchen, I have cooked beef tongue, beef heart, marrow bones, and chicken livers.  The nutrient profile of beef heart is stunning: vitamin B6, Vitamin B12, niacin, riboflavin, thiamin, selenium, and iron, to name a few. The “iron” taste usually wears off after the first bite or so and the marinade makes these beef kebabs almost irresistible. A good local butcher or vendor at a farmer’s market should have heart, most likely already butchered.  This recipe is for .7 lb of butchered heart meat (no fat, gristle, etc.); it yields about 4 small servings.  If you have any leftovers, refrigerate and enjoy cold the next day.

Cookware:
mini food processor (or blender)
charcoal (or gas) grill
basting brush
8 bamboo skewers

Ingredients:
1 butchered beef heart (approx. .7 lbs; cut into 1-inch pieces)
½ cup red wine vinegar
2 tbsp ground cumin
½ tsp black pepper
½ tsp salt
3 garlic cloves
1 tbsp fresh parsley
1 tbsp fresh cilantro
2 dried chiles* (available at any Mexican grocery or ethnic foods aisle of your local supermarket)
¼ cup + ½ cup olive oil


*There are a great variety of chiles out there (Ancho, Guajillo, Pasilla, Arbol) so it really depends on your personal preference.  I tend to use different chiles every time I make this dish - so the marinade comes out a little different each time


Marinated and ready for the grill!


Directions:
1. Soak the chiles in hot water until soft (anywhere from 15-30 minutes, depending).  Cut the chiles open, de-seed and de-vein them (you may want to use gloves because the sting of the pepper will stay on your hands for awhile).
2. In your food processor, mix the chiles, ¼ cup of the olive oil, and the rest of the ingredients until a paste forms.
3. Combine heart pieces and marinade in a ziploc bag (or other closed container), and refrigerate for 30 minutes.  Do not marinate them for much longer because the vinegar will dry out the meat.
4. While the heart is marinating, soak at least 8 thick bamboo skewers in water and start your grill.  Make sure the coals are very hot before you add your meat (so you can get a nice char on the kebabs).
5. When the heart is done marinating, add 3 or 4 pieces to each skewer.  Make sure to arrange them so that the meat will lay flat on the grill.  Save the leftover marinade.
6. Add the remaining ½ cup of oil to the reserved marinade and set aside.
7. Before adding skewers to the grill, baste with the reserved marinade.  Make sure the basted side always ends up face down on the grill (since the original marinade had raw meat in it).  Grill for about 2 minutes per side.  Make sure not to overcook them because the heart will dry out and become tough.


Mmm...kebabs

This really is the perfect recipe if you're curious about offal but timid about diving in too deep.  The recipe is simple and because the heart is an organ comprised mostly of muscle - it still has that familiar texture of the meat we're used to eating.  When marinated properly, it tastes like the most tender prime cut of steak.  And while you've got the grill going, feel free to grill up some summer squash or sweet potato slices to serve alongside this flavorful protein.  I hope you give these kebabs a try this summer.  Happy cooking!

Wednesday, April 24, 2013

Easy Paleo Side Dishes and Snacks from the Oven

Sometimes, I spend hours in the kitchen - chopping, sauteing, braising - only to end up with an out-of-this world protein dish and little-to-no vegetables!  These side dishes have come to the rescue on many occasions when I just don't have the energy to make something more complex, like my Brussels Sprout Slaw or Cashew-Covered Broccoli.

Oven-Roasted Asparagus

This is something I make ALL the time (as my co-workers can attest).  It's so crazy simple that it almost feels like cheating.

Instructions:
1. Rinse one bunch of asparagus and cut off the woody ends.  You could snap them off, but you're more likely to snap off some of the good stuff as well.
2. Toss with olive oil, salt and pepper.
3. Spread evenly on a baking sheet and place on the center rack for about 8 minutes (the time varies depending on your oven and how thick the spears are).  You will know they are done when they turn bright green AND give just a bit when you touch them with a fork.  Don't worry about the sizzling - that is normal and will occur throughout the entire roasting process.

I am so determined to have my veg that I will sometimes cook this recipe AT WORK on my lunch break.  I grab ten spears out of a bunch, toss them with olive oil, salt and pepper, lay them out on a super high-tech tray fashioned out of aluminum foil, and cook in the tabletop toaster oven at 350° until done.

Oven-Roasted Okra Bites
I always make this whenever I make gumbo.  It's tough to gauge how many okra spears will equal the 3 cups I need for my gumbo recipe, so I always end up with leftover spears.  Now I make sure to buy way too much just so I can make this delicious snack!

Instructions:
1. Wash approx. 1 lb. okra and chop into 1-inch slices.
2. Toss with olive oil, salt and pepper.
3. Spread evenly onto a baking sheet (make sure none are overlapping) and bake at 400° for 30-40 minutes, turning once.

Seriously, these are so delicious that they rarely even make it off of the baking sheet before I've devoured them all.

Kale Chips


I've only made these a few times and they really are more fun to cook than to eat.  The chips are so light, you can hardly tell you've eaten anything at all.  Still, it's a good way to try out some spice mixes.

Instructions:
1. Grab one bunch of kale and cut the leaves off of the stems.  Rip or cut the leaves into smaller pieces.
2. Toss with olive oil, salt and pepper.
3. Spread evenly on a baking sheet (make sure none overlap) and bake at 350° for 20 minutes or until crispy.

Feel free to add any spice mix laying around in your pantry before baking.

Oven-Roasted Summer Vegetables


One of my absolute favorite veggie sides.  I love to serve this alongside a French protein dish, like Coq Au Vin.

Instructions:
1. Roughly chop 1 red onion, 1 large zucchini, 1 large yellow squash, 1 medium eggplant, and 1 bunch of broccoli.  Add all veggies to a 13x9 baking dish along with 6 large cloves of peeled garlic.
2. Toss veggies with 2 tbsp. of Herbes de Provence (or Italian Seasoning) and 5 tbsp. olive oil.
3. Bake in the oven for 45 minutes at 350°.

I always get a lot of "it smells so good in here" whenever I'm reheating this in the kitchen at work.

Well, that's all of them.  All you really need is an oven, some veggies, oil, salt and pepper and your imagination.

Monday, March 25, 2013

Pork and Sweet Potato Stew

Stew is, by far, one of my favorite types of dishes to make - right up there with casseroles.   Meat and Veg in one dish is every Paleo girl's dream!   I love a meal that requires me to only bring one tupperware dish to work rather than 2 or 3.  I don't have to go into panic mode hurriedly whipping up another vegetable side because I ran out of broccoli but still have tons of chicken left over.   I originally found this recipe at Redeeming the Table.  I love how the vegetables absorb all of the delicious flavors of the meat, aromatics and spices.  I think it would be a great dish to make for kids.  It's easy to cook except that, like most recipes that are fully homemade, it requires a bit of chopping.  But it will all be worth it when you just smell the final product.  The most surprising part about this stew is how the lime wedges and fresh cilantro really bring the dish together, as simple as they are. 

mmm, meat and veg...

Equipment Needed:
large, heavy-bottomed pot (I use a cast-iron dutch oven)
oven

Ingredients:
2 lbs. pork stew meat (just ask your butcher - or farmer's market vendor - what cut is best), cut into 2-inch pieces
salt and pepper
2 tbsp. plus 1 tbsp. of your favorite cooking oil (coconut oil, bacon fat, etc.), separated
1 small (or 2/3 large) yellow onion, diced
4 garlic cloves, chopped
1/2 cup chicken broth
4 cups boiling water (love my electric kettle!)
1 (4 oz.) can diced green chiles
1 tbsp. apple cider vinegar
1 tbsp. maple syrup
2 lbs. sweet potatoes, peeled and chopped
For serving:
lime wedges
chopped (or torn) cilantro

Directions:
1. Rinse pork (before cutting) and pat dry.  Sprinkle salt and pepper over the pork pieces.
2. Heat oven to 325°F.  Heat 2 tbsp. coconut oil in a heavy-bottomed pot on the stove over medium heat.
3. Add meat and brown on all sides (work in batches if you need to - don't overcrowd the pot).  Remove meat with slotted spoon and set aside.
4. Add remaining tbsp. of coconut oil to pot, then add onions and cook until translucent (don't brown).
5. Add garlic and cook for one minute.  Add chicken broth and stir up all the browned bits at the bottom of the pot (called "deglazing").
6. Add boiling water and meat, then cover and braise in the oven for 2 hours.
7. Carefully remove the pot from the oven and add chiles, vinegar, maple syrup and sweet potatoes.  Cover pot and put back in the oven for another hour.
8. Serve with lime wedges and fresh cilantro.

post-lime carnage

Monday, February 18, 2013

Paleo New Orleans-style Gumbo


I have many fond memories of my French Cajun MawMaw spending all day in the kitchen, filling the entire house with the amazing aromas of gumbo.  I even remember her serving me a bowl before she added shrimp to the pot (I hated seafood back then).  Nowadays, I find the shrimp to be the best part - that final piece of the puzzle that makes gumbo such a satisfying meal.

This is actually a combination of two different recipes.  I use the guidelines for making a Paleo roux from the Paleo Comfort Foods cookbook.  The rest of the recipe comes from GumboCooking.com.  Enjoy cooking this flavor-packed dish when you have a little extra free time to spend in the kitchen.  Your family will love you for it.


so many shrimps!

Prep Time: 30 minutes
Cooking Time: 2 hours
Servings: 8

Equipment needed:
large pot with lid (I love my cast iron dutch oven)

Ingredients:

For the roux
1/3 cup bacon grease (or favorite cooking fat)
4 tbsp. coconut flour
4 tbsp. almond flour

For the gumbo
1 lb. medium uncooked shrimp, peeled and deveined
1/2 lb.skinless, boneless chicken breast, cut bite size
1 lb. andouille sausage*, cut bite size
1 tbsp. bacon grease (or favorite cooking fat)
2 cups chopped onions
1 cup chopped celery
1 cup chopped green pepper
6 cups chicken stock**
1 tbsp. minced garlic
1 tsp. creole seasoning
1 tsp. fresh thyme, chopped
1/2 tsp. crushed red pepper
1 (14.5oz) can diced tomatoes
2 bay leaves
1 tsp. Tabasco sauce
3 cups sliced okra
1/2 cup fresh parsley, chopped
2 tsp. file powder (added after the gumbo is finished cooking)

*don't skimp on quality - this will determine the flavor of the entire gumbo.  I use this (available at Whole Foods).
**I use 3 cups chicken broth and 3 cups filtered water

Directions:
1.  Coat the bottom of the pot with 1 tbsp. cooking fat and brown the chicken and sausage over medium high heat.  Remove from pot and set aside.
2.  Add the 1/3 cup of cooking fat for the roux and once heated, whisk in coconut and almond flour.  Once integrated, it will resemble a thick paste.  Vigilantly whisk all areas of the bottom of the pot continuously to keep the roux from burning.  Once the roux has turned very dark brown, add the chopped vegetables and saute on low for 8-10 minutes.

roux-coated chopped veggies

3. Gradually add the chicken stock stirring constantly until blended.
4. Add the chicken, sausage and the rest of the ingredients EXCEPT shrimp, okra, parsley, and file powder.
5. Cover and simmer* on low heat for 30 minutes.  Remove lid and cook for 30 more minutes stirring occasionally.
*where a few bubbles barely come to the surface
6.  Add shrimp, okra and parsley and cook for 15 more minutes, uncovered.


Enjoy with some cauliflower rice or just on it's own!