Wednesday, January 17, 2024

Mel's Pico de Gallo

 Pico de Mel, if you will.

2x jalapenos, chopped (one with seeds, one without)

3 bell peppers (red, orange, yellow), chopped

3 roma tomatoes, chopped

2 beefsteak tomatoes, chopped

1/2 red onion, chopped

1/2 mango, chopped

1 bunch cilantro, chopped

juice of 3 limes

1 tbsp salt


1. make sure to chop all veggies to similar size; add everything to a bowl and stir

2. allow mixture to chill in the fridge for 1 hour; taste and add salt or lime juice as needed


Wednesday, May 26, 2021

Chicken Molé

Even though I grew up in a Tejano household, my family never had the patience to tackle molé from scratch.  We stuck to the always-popular 'steak fajitas and homemade tortillas' route (which I am NOT complaining about :D).  Now that cooking is one of my primary hobbies, I seek out from-scratch recipes that take an entire evening, or even weekend, to complete.  Fortunately, this one only took a few hours.  And I paired it with some simple slow-roasted cauliflower (something starchy to soak up all the amazing sauce).  This recipe makes a lot of molé and it freezes very well!  I originally found this recipe at Epicurious.

Equipment:
cast iron dutch oven (or other heavy bottomed soup pot) with lid
large heavy-bottomed saucepan (I use my Cuisinart 12-inch stainless steel) with lid
citrus juicer (if using fresh orange juice)
blender (or food processor)

Ingredients:
(1+2) tbsp cooking fat
(5) lbs boneless, skinless chicken thighs
(3) cups chicken broth
(2) cups orange juice (I like to fresh squeeze mine - at least 3 oranges)
(3) large onions, sliced
(1/2) cup sliced almonds
(6) garlic cloves, sliced
(4) tsp comino seeds
(4) tsp coriander seeds
(4) oz dried pasilla chiles*
(4) oz dried negro chiles*
(1/4) cup raisins
(1 1/2) tsp dried oregano
(4) 3 1/2-inch strips of orange peel (just the orange part, not the white)
(1) 3-ounce disk of Mexican chocolate**, chopped (not the hot chocolate drink mix)
fresh cilantro, chopped

*stemmed, seeded, rinsed and torn into 1-inch pieces (wear gloves when doing this!)

Directions:
1. Heat 1 tbsp of cooking fat in dutch oven.  Salt and pepper both sides of the chicken.  Add chicken to pot and sauté until lightly browned (adding more fat as needed).  Work in batches (do not overcrowd the pan).
2.  Once all of the chicken is cooked, add all of it back to the pot, along with chicken broth and orange juice.  Bring to a boil, then cover and simmer until chicken is cooked through (about 25 minutes).
3. While chicken is simmering, heat remaining 2 tbsp fat in a large heavy saucepan.  Add onions and sauté until golden brown (about 20 minutes).  Reduce heat to medium, then add almonds, garlic, comino seeds and coriander seeds.  Sauté until almonds begin to brown.  Add chiles and stir until they begin to soften (2 minutes).
4.  Transfer chicken (with tongs or slotted spoon) to a large bowl.  Pour the chicken cooking liquid into saucepan (reserve pot afterwards) with onion mixture.  Add raisins, orange peel and oregano to saucepan.  Cover and simmer until chiles are soft, stirring occasionally (about 30 minutes).  **This is when you would make the roasted cauliflower if you choose to make it)**  Remove pan from heat and add chocolate.  Let sit for 15 minutes, until chocolate completely melts and sauce cools.
5.  In small batches, add sauce to blender and puree until smooth (return pureed sauce to dutch oven).  Add salt and pepper.  Coarsely shred chicken (I use my food processor) and add it to the dutch oven with the sauce.  Stir to coat.

I have to admit, I haven't made this in awhile, but just reading over it again makes me want to add it to my meal plan for next week.  The tastes in this molé are far more complex than anything you will ever taste out of a can (even after being thawed from the freezer).  Enjoy!

Grain-Free Granola

One of the toughest things about being Paleo is lack of snack options.  There are plenty of whole foods you can snack on (apples, almonds, etc).  But every once in a great while you crave something crunchy, salty and sweet (something Paleo foods are severely lacking in).  The ingredient list is pretty vague, allowing you to experiment with different fruit/nut combinations.  I warn you, this granola is highly addictive.  It is best enjoyed after some sort of physical exertion (workout, bike ride, etc).  I originally found this recipe at Joyful Abode.

Equipment: 
food processor
small saucepan

Ingredients:
2 1/2 cups nuts and seeds
1 cup dried fruit
2 cups shredded coconut
1/4 cup coconut oil
1/2 cup honey
vanilla extract
1/2 tsp salt
cinnamon

Directions:
1. Preheat oven to 350°.  Chop 1 cup of the nuts and seeds.  Move to large mixing bowl.
2. Pulse the other 1 1/2 cups in a food processor (finer chop).  Add to mixing bowl.
3. Add fruit and dried coconut.
4. In a small saucepan over medium-low heat, combine oil, honey, vanilla, salt and cinnamon.  Cook until mixture bubbles.  Pour over fruit/nut mixture.  Stir to combine.
5. Pour mixture into a parchment paper-lined baking sheet and flatten with spatula (or hands).  Make sure the mixture is as compact as possible.
6. Put in oven for 15 minutes.  Remove the pan when the nuts are starting to brown.
7.  After allowing it to cool, crumble the granola into a tupperware container for storage.

Tacos Al Pastor


Now, while the typical way of serving al pastor is definitely not paleo, the pork itself is perfectly within the limits of a paleo diet and can be enjoyed by itself or on top of fresh greens as a "taco" salad.  I based this recipe off of one I found on tasty.co and it is the closest I've been able to come to recreating that classic Southern California staple: taco truck al pastor.

Equipment

gallon ziploc or tupperware with lid for marinating pork

4 or 6 wooden skewers

baking sheet or casserole dish (optional: line with foil for easy cleanup - the oven cooks off A LOT of fat from the pork)

small saute pan (cast iron recommended)


Ingredients

3-5 lb. BONELESS pork shoulder

3 tbsp achiote powder (or paste)*

2 tbsp chili powder

1 tbsp garlic powder

1 tbsp dried oregano

1 tbsp cumin

1 tbsp salt

1 tbsp pepper

3/4 cup white vinegar

1 cup pineapple juice**

1 fresh pineapple

*achiote: I have trouble finding this at some supermarkets so if you have a Latin grocery store in your area, check there.  You MIGHT also have luck in the latin aisle of your neighborhood supermarket

**I use frozen pineapple juice concentrate in 11.5oz containers.  Add 2 oz to a cup and fill the rest with water


Directions

1. Using a very sharp knife, slice the pork shoulder into 1/4 inch slices.  I find it helps if the pork is mostly defrosted or at least kept in the fridge immediately before slicing - the pork is much easier to cut while cold.

2. Mix all of the ingredients together (except the fresh pineapple) and make sure it is free of lumps before adding the pork slices.  Marinate anywhere from 3 hours to overnight.


3. Preheat the oven to 350F.  Skin the pineapple and cut it into 1-inch rounds (you will need at least 6 slices).  Make 2 stacks of 2 slices of pineapple in the bottom of the baking sheet.  Depending on the size of the skewers, stick 2 to 3 into each stack of pineapple - pointy side up.


4. Remove the pork from the fridge and stack the slices onto the pineapple, piercing the middle of each pork slice with the skewers.  I find it best to alternate stacks with each slice, making sure to put the largest slices at the bottom of each stack and the smallest slices at the top.  Finish each stack with one more slice of pineapple and push down to compress the pork into a denser stack (this will help retain flavor during baking).


5. Bake for 3 hours, checking every now and then to make sure the towers haven't fallen over.  This tends to happen and I have tried various engineering feats, none of which work 100% of the time.  My most frequent method is to arrange the racks in the oven so that the top of the skewers poke through the top rack while the bottom rack holds the baking sheet.  The towers always tend to lean a little bit, so try to make them lean against the center rail of the top rack.

6. Remove the pork from the oven and let rest a few minutes before carefully removing the pork from the skewers with your carving knife.  Chop the pork and 3 of the 4 slices of pineapple from the bottom of the stacks (the top ones are too dry).  Mix the pork and pineapple thoroughly then add the amount you want to serve into a small saute pan (I use cast iron) over medium heat.  Stir frequently until the pork has cooked off a lot more fat and the edges start to char.  Set the pork on paper towels to wick away more of the fat (good lord, there's so much fat)


7. non-paleo serving suggestion: serve with warmed tortillas, chopped white onion, cilantro and squeezes of lime


This is my favorite new culinary discovery and I keep a steady supply of pork shoulders in my freezer just for this dish.  Enjoy!


Saturday, August 8, 2015

Banana Nut Mini Muffins


I haven't baked in a long time but when I did, I made these on the regular (along with my chocolate chip cookies).  They are perfectly bite-sized and a great protein-dense, after-workout snack.

Servings: 24 mini muffins

Equipment:
mini muffin tins
wire cooling rack

Ingredients:
1/2 cup coconut flour
6 eggs
1/3 cup honey
1/3 cup coconut oil (melted)
2/3 cup crushed walnuts
2 bananas, diced
1 tbsp vanilla extract

Directions:
1. Preheat oven to 350°.  In a large bowl, whisk all ingredients (except bananas) together.  Make sure all lumps are gone, then add the bananas.
2. Pour batter into oiled muffin tins and bake for 25 minutes.  Cool on a wire rack before serving.

That's it!  Super simple and crazy delicious.


Ratatouille


I admit - I was initially inspired to cook Ratatouille after I saw the Pixar movie.  That movie got to me on so many levels.  And I always gravitate toward farm-based comfort food so I was very intrigued by this dish.  I don't make the version made in the movie, but instead make a much more rustic version - with large pieces of each vegetable that you have to cut through like a steak when enjoying the finished dish. It's amazing how much the basil and parsley adds to this dish.  It's the very definition of "cozy".  I originally found this recipe in Saveur magazine.

Servings: 4
Cooking Time: 2 hours

Equipment:
cast iron dutch oven

Ingredients:
1/2 cup cooking fat
1 tbsp dried herbes de Provence
6 cloves garlic, peeled
2 large yellow onions, quartered
1 bay leaf
2 medium zucchini (1 1/4lbs), cut into 2" pieces
1 medium eggplant (14 oz), cut into 2" pieces
1 red bell pepper, stemmed, seeded, quartered
10 whole peeled tomatoes from the can, drained
1 tbsp fresh basil, chopped
1 tbsp fresh flat-leaf parsley, chopped


pre-prepping ingredients is a great time-saver


Directions:
1. Pre-heat oven to 400°.  Heat cooking fat in dutch oven over medium heat.  Add herbes de Provence, garlic, onions, and bay leaf.  Cover and cook until soft (about 10 minutes).
2. Turn heat to high, stir in zucchini, eggplant, pepper, tomatoes, salt and pepper.  Remove lid and transfer pot to oven.  Bake for 1 1/2 hours, stirring occasionally (all veggies should be tender and lightly browned).  
3.  Remove pot from heat.  Stir in basil and parsley.


I usually cook this alongside my favorite recipe for Coq Au Vin (which also takes it's fair share of time in the kitchen) - but again, the flavors can't be beat.


Sunday, November 30, 2014

Olive, Lemon and Garlic Chicken

Citrus makes everything better!

This is the first Paleo recipe I ever made and it's definitely one of my favorites.  It is a bit time-consuming as far as prep and cook time goes, but the resulting flavors are absolutely delicious.  As always, the lemon ends up being my favorite part of the dish.  The only drawback to this recipe is that it doesn't make enough food to last more than a few days (for one person) because the chicken thighs are so small.  I would recommend serving this dish along with a simple veggie side since the dish is very fat/protein-heavy.  I originally found this recipe at Paleo Leap.


Equipment:

oven-proof 12-inch skillet with lid
large chef's knife

Ingredients:

1/4 cup cooking oil (I use clarified butter/ghee)
1/2 lb. black olives (kalamata), cut in half
10 bone-in, skin-on chicken drumsticks
3 cups onions, sliced thin
30 (that's right, 30) cloves of garlic, creamed*
1/2 cup lemon juice
2 lemons, thickly sliced
1.5 cups chicken stock**
1 bunch of thyme leaves, picked from stems
salt and pepper to taste

*how to cream garlic: mince all of the garlic, then sprinkle liberally with salt; take flat side of chef's knife and slowly drag it across pile of minced garlic; repeat until you see garlic start to break down into a paste


**half chicken broth/half water is what I use for "chicken stock"


Directions

1. Preheat oven to 350°
2. Add cooking oil to pan and brown chicken drumsticks on both sides.  Remove chicken from pan and set aside.
3. Add onions to pan and scrape up browned chicken bits from the bottom of the pan.  Cook until onions are soft (about 3 minutes).
4. Add garlic and cook until fragrant (about a minute).  Season with salt and pepper.
5. Add chicken stock, thyme, lemon juice and drumsticks to the onions and garlic.
6. Bring to a simmer, cover pan and put in oven for 20 minutes.
7. Remove pan from oven and add olives and lemon slices.  Bake uncovered for another 15 to 20 minutes.

Enjoy!

Sunday, August 10, 2014

Zoodles and Squoodles Pizza Casserole

****UPDATE****
Want to know how it tastes?  Check out my web series Table Scraps, where my friend Jeremy and I eat and discuss this delicious Paleo dish.

Mmm...veggie sketti

I used to love spaghetti with meat sauce.  It was my favorite food back in the day when I was a really picky eater and refused to eat anything resembling a vegetable.  This dish tastes EXACTLY like that - but it's got so much more going on than just pasta, meat and tomatoes.  This is one of those dishes you can easily experiment with, adding spices and veggies as you like - although I would recommend keeping with the Italian theme of the dish so that all new flavors you introduce won't clash with the existing base flavors.  I originally found this dish at PaleOMG but replaced most of the dry spices with whole vegetables for a more well-rounded dish.


Prep Time: 30 minutes

Cook Time: 55 minutes
Servings: 8

Equipment Needed:

mandoline slicer with julienne attachment (if you can julienne veggies with just a knife, more power to ya)
colander
paper towels
skillet
13x9 baking dish


Ingredients:

2 lbs. grass-fed ground beef (I've also made it with ground bison)
15oz. can pizza sauce
15oz. can fire-roasted crushed tomatoes
4 zucchini
4 yellow squash
2-4 cloves garlic, minced
1 onion, chopped
1 box of mushrooms, sliced
2 tbsp. Herbes de Provence (or Italian Seasoning)
2 tbsp. cooking oil (coconut oil, bacon grease, duck fat, olive oil)
salt and pepper

Directions: 

1. Cut the ends off of your zucchini and yellow squash.  Using a mandoline slicer, julienne the zucchini and squash.


Don't forget to use the safety holder!

2. Throw all of your veggie noodles in a colander and salt liberally (tossing to make sure salt gets to all of the noodles).  Let sit (over a bowl or in the sink) for half an hour.


Noodles mid-sweat

3. Preheat oven to 375 degrees.

4.  While noodles are 'sweating', heat your cooking oil in a skillet and add your ground beef.  Then add your onion, garlic, mushrooms, and italian seasoning.  Once the meat has browned and your onions and mushrooms get soft, add the crushed tomatoes.  Cook for another 5 minutes.  Turn off heat and set aside.
5. Rinse the veggie noodles to get rid of the salt, then, two handfuls at a time, gather some in a few paper towels and firmly but gently squeeze them to wring out the excess water (there will be a lot).  Do not skip this step - it will give your veggie noodles better crunch and will keep the casserole from being too watery.
6. Add the veggie noodles to your casserole dish along with your ground beef/tomato mixture.  Add pizza sauce, salt and pepper.  Mix thoroughly to combine (be careful - your casserole dish will be quite full).  You can also mix everything in a large bowl and then pour it into your casserole dish.
7. Cook in the oven for 40 minutes until the top veggies are slightly browned and the noodles are soft.
8.  Let sit for half an hour before cutting into it.

That's it.  Pretty simple.  And it makes a ton!  You can use the 'sweating' method for any recipe that calls for zucchini noodles.  It makes such a difference in the texture of the final product.


Want to know how it tastes?  Check out my recipe review web series Table Scraps where my buddy Jeremy pulls no punches in reviewing all of my homemade Paleo recipes.


(EDIT: I recently updated the ingredients list in order to double the amount of zucchini and yellow squash used.  In order to truly make this an all-in-one meal, I felt the casserole needed more veg to balance out all that protein)


Sunday, August 3, 2014

Homemade Chorizo From Scratch


homemade chorizo chillin' in the freezer

Sweet Potato Breakfast Hash with Homemade Chorizo

I LOVE Mexican chorizo.  And I take great pride in making as many dishes as possible from scratch.  This is one of my favorites as it is a bit labor intensive and includes waiting at least 2 days(!!!) before getting to taste the fruits of said labor.  The depth of flavor you get from this chorizo vs. store-bought is ridiculous (one might even say riDONKulous - not me, of course, because I'm an adult).  This is what I like to call "project cooking" (a term I stole from some bouldering lingo).  Don't zone out during the prep work and hurry through it just to be done cooking.  Relish the amount of care and time it takes to make something that is truly homemade.  The final flavor profile (smoky from the chiles and sour/tangy from the apple cider vinegar) is your reward.

Prep Time: 1.5 hours
Inactive Prep Time: 1 hour for the chile/spice mixture to chill and 2 days for the chorizo to marinate

freshly-made chorizo needs 2 days to marinate

Equipment Needed:
large skillet (I recommend cast iron)
large mason jar (or large glass bowl)
gloves (latex/disposable)
large food processor (or blender)
small food processor (or molcajete - preferrably made from volcanic rock)
large non-reactive bowl with lid (if you don't have a lid, plastic wrap/aluminum foil works just fine)
parchment paper
plastic wrap

Ingredients:*
8 guajillo chiles**
4 ancho chiles**
2 fresh ripe (red) jalapenos (pith and seeds removed), roughly chopped***
2 bunches of scallions (green onions), chopped
6 cloves of garlic, roughly chopped
4 tablespoons fresh oregano, minced (or 4 teaspoons dried)
2 heaping teaspoons black peppercorns
4 teaspoons roasted comino (cumin) seeds
1.5 tablespoons achiote powder**
2 heaping teaspoons allspice berries**
2 tablespoons sea salt (or kosher salt, just not that iodized table salt crap)
1 cup apple cider vinegar
2 pounds ground pork

*This makes A LOT - about 3 pounds worth of chorizo when all is said and done.  Feel free to halve the ingredients.  But I figure, if you're going to take the time to make it, why not make a lot!  It keeps great in the freezer.
**available at most Mexican markets.  My favorite here on the Westside of Los Angeles is Top Valu Market in Del Rey.
***I find it pretty impossible to find red jalapenos anywhere.  I was lucky enough this most recent time to get some from my co-worker's backyard garden.  Green jalapenos work just fine.

rehydrated chiles and herbage pre-blend

Directions:
1. Bring 6 cups of water to a boil (I use an electric kettle - best $25 I ever spent).  While the water is boiling, heat your cast iron skillet over medium-low heat and toast your chiles until the skin is slightly darker (not black!) and they are more pliable.  The guajillos should puff up a bit as well.  Turn them often to make sure they don't burn.  Shouldn't take more than 8 minutes tops.
2. Add your toasted chiles to your mason jar or glass bowl and pour the boiling water over them.  If using a glass bowl, you may have to put a colander over the top of the chiles to keep them from floating on the surface of the water.  Set aside for 20-30 minutes.
3. Drain the chiles.  Put on your gloves (the oil from chiles can stay on your hands for days and you do not want to rub your eyes with chile hands).  One at a time, tear the stem off of the top of the chile.  Stick your finger in the top opening and rip open the chile lengthwise.  Remove the slimy pith and all of the seeds (I do this over the kitchen sink - it can get a bit messy).
4.  Add the cleaned chiles, jalapenos, scallions, garlic, oregano and apple cider vinegar to a large food processor and puree.
5.  Add whole comino seeds to cast iron skillet over medium-low heat and move around until toasted/fragrant - about 8 minutes.
6.  Add toasted comino seeds, black peppercorns, achiote powder, allspice berries, and sea salt to a small food processor (or grind by hand with a molcajete) and process until they form a coarse powder.
7. Add spice powder to large food processor and process to combine.  Put mixture in non-reactive bowl, cover and chill in fridge for an hour.
8. After the spice mixture has chilled, add cold ground pork and combine mixture thoroughly by hand (don't forget to wear gloves!).  Cover chorizo and store in the fridge for 2 days before using.  
9. After 2 days, I usually split the sausage into 6 equal parts (1/2 pound each) if I'm not cooking any of it right away.  I take each part, roughly form it into a sausage shape (gloves again!), roll in plastic wrap (as tightly as you can), then roll in parchment paper, twisting the ends of the parchment paper to help the sausage keep its shape.  Toss in the freezer until you're ready to cook!  

my gloves after making chorizo

Phew.  It was a lot of work and waiting 2 days before cooking it will definitely test your patience, but it will all be worth it when you taste it for the first time.  I use this chorizo in place of regular pork sausage in lots of my favorite recipes, including Primal Breakfast Casserole, Sweet Potato Breakfast Casserole and Sweet Potato Breakfast Hash.  Most store-bought sausages are about 1/4 pound each so each of your homemade sausages should be the equivalent of 2 store-bought.  Happy cooking!

Sunday, July 27, 2014

Cauliflower Sticky Rice


Cauliflower rice is definitely a saving grace for all things Paleo.  It always seems like finding a delicious protein/meat is easy but finding a flavorful vegetable side dish to go with it (that doesn't take another hour to prepare) can be a bit more difficult.  I love using cauliflower (and zucchini and crookneck squash) as low-carb substitutes for grain-based/high-starch sides.  The taste difference is minimal (because, let's be honest - bread, pasta and white potatoes don't have much of a taste to begin with).  My Moroccan Chicken Casserole also has a delicious base of cauliflower rice that perfectly soaks up all the amazing flavors of the chicken and spices.  I originally found this recipe at PaleOMG.  It's a great and simple improvement on plain old cauliflower rice, with the addition of coconut milk and raw honey.

Prep Time: Less than 10 minutes (with food processor)

Cooking Time: 25 minutes (depending on size of cauliflower head - they tend to vary)

Equipment Needed:

food processor with grating attachment (you can also use a box grater, but it's a bit more time consuming)
small/medium stock pot with lid (large enough to accommodate a whole head of cauliflower, chopped into florets)

Ingredients:

1 head cauliflower (stem removed), chopped into florets
1/3 cup coconut milk (not coconut milk beverage!)
1/4 cup unsweetened shredded coconut
1 tablespoon coconut oil*
1 teaspoon raw honey
pinch of salt

*I'll see some websites preferring virgin coconut oil over refined for cooking.  I would not recommend this as virgin coconut oil has a lower smoke point (similar to extra virgin olive oil) and is better suited to health and beauty needs rather than as a cooking oil.


goes great with gumbo!

Directions:

1. Add florets to food processor and "rice" the entire head of cauliflower (in batches)
2. Add coconut oil to stock pot over medium heat, then add cauliflower rice with a pinch of salt and cover for about 10 minutes.  Stir occasionally to make sure the bottom doesn't burn.
3. When it looks like the rice is about 10 minutes away from being done (this will just take practice), add the coconut milk, shredded coconut and raw honey.  Mix well and cover.  Stir frequently.
4.  Cook until the liquid from the coconut milk has evaporated and the rice is soft, but not mushy (about 5-8 minutes).


Tikk-a, Tikk-a, Tikka Masala (that's my Tikka Masala song)

There is a very good chance you will overcook the rice the first couple of times.  Dont fret!  This is very common (and still happens to me from time to time).  It will not change the taste of the dish, merely the texture.  So what if you end up with sticky coconut cauliflower mash rice - it'll still taste great when you smother it with Tikka Masala.  And don't worry, the coconut taste is not that strong, so feel free to serve it with something that doesn't pair well with coconut, like Gumbo!

Saturday, January 4, 2014

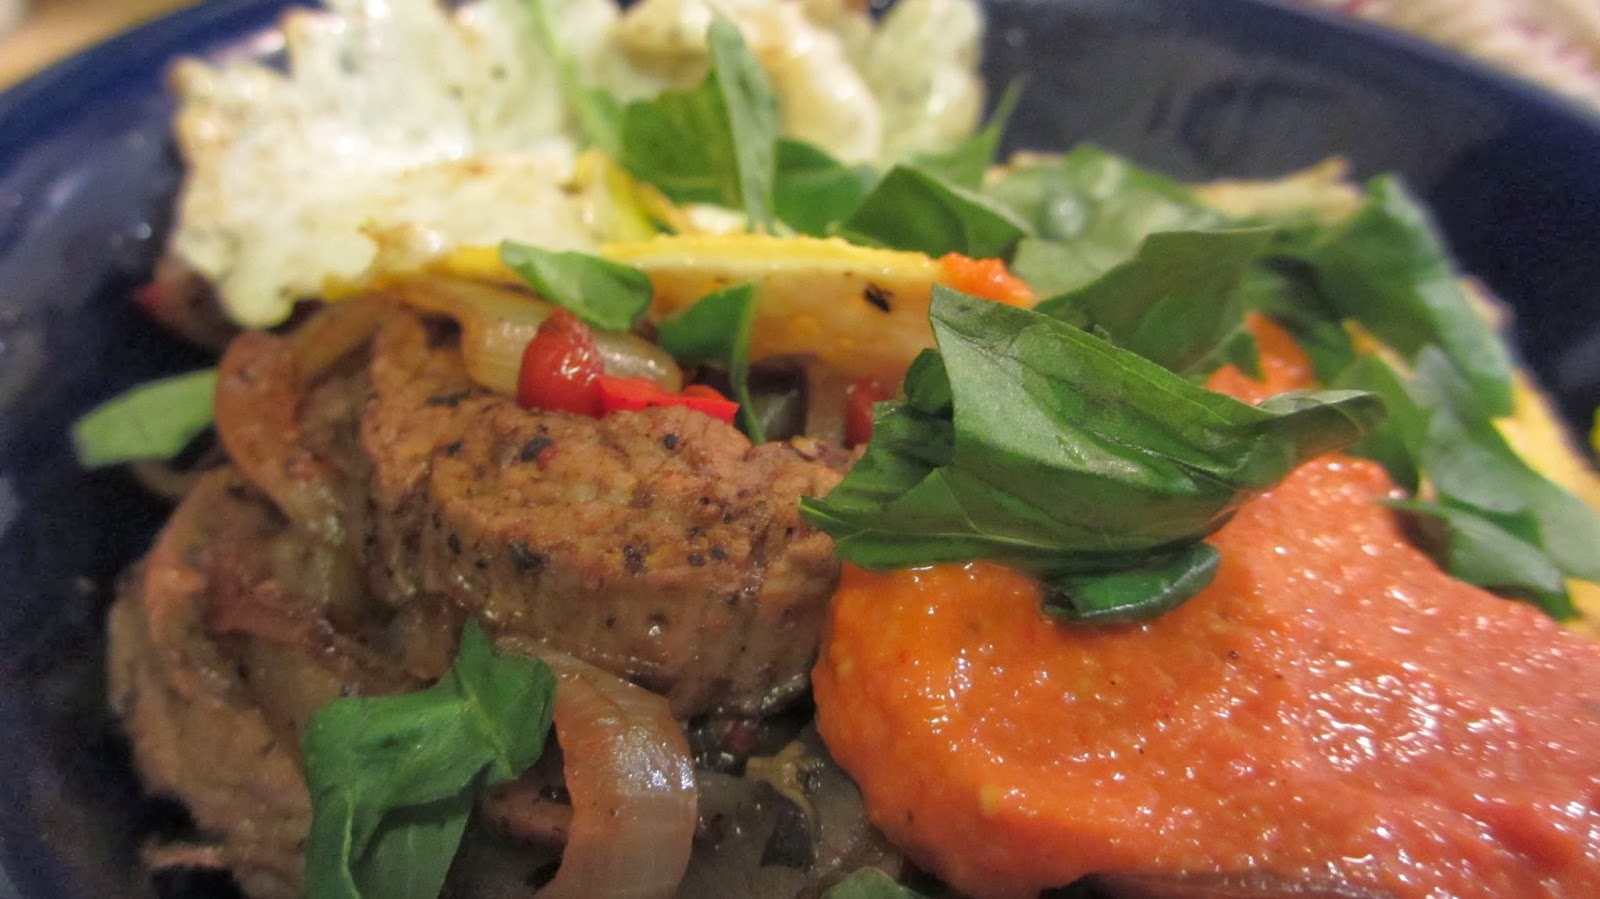
Bison Skirt Steak Hash with Red Pepper Spread

Hash is one of those dishes custom-made for lazy cooks.  Chopped veggies plus meat plus herbs plus spices plus fried egg equals friggin' delicious!  This hash has an extra-fancy component of red pepper spread made with avocados that is just the proverbial icing on the cake to this no-hassle dish.  Yet another great recipe I borrowed from PaleOMG.  I changed it a bit by using bison skirt steak I found at the farmer's market instead of beef.  I love bison.  It's such a great substitute for beef, and generally much leaner - if you care about that kind of thing (which I don't).  But really I'm always excited for any excuse to use anything other than beef, chicken or pork.  Variety is the spice of life, don't cha know.


Prep Time: 30 minutes

Cook Time: 30 minutes

Equipment Needed:

food processor (or blender)
cast iron skillet (regular saute pan will do in a pinch)

Ingredients:

For spread
2 avocados, peeled and de-seeded
8-10 oz jar (drained) of roasted red peppers
2 tsp garlic powder
salt
For hash
cooking fat
14 oz bison skirt steak (beef will work as well)
salt and pepper
1/2 tsp dried basil
1/2 tsp dried oregano
large yellow onion, peeled and sliced
red bell pepper, diced
8oz container mushrooms, sliced
eggs cooked to your preference
handful of fresh basil, chopped


Directions:

1. Allow skirt steak to come to room temperature (about half an hour).
2. Add spread ingredients to food processor and blend.  Refrigerate.
3. Heat cast iron skillet over medium heat.  Sprinkle both sides of skirt steak with salt, pepper, dried basil and dried oregano.
4. Add cooking fat to skillet and cook steak for approximately 4 minutes per side or to your desired degree of doneness.  Remove steak and cover with aluminum foil.
5. Add onions to cast iron (without cleaning) and sprinkle with more salt.  Cover and cook onions, stirring occasionally until caramelized (about 6-8 minutes).  Remove onions and set aside.
6. Add bell pepper and mushrooms to cast iron, sprinkle with salt and cover to cook down (about 3-5 minutes).  Remove from heat.
7. Slice steak and combine with the caramelized onions, bell pepper and mushrooms.  Stir well.
8.  Cook eggs to preference and serve on top of hash along with fresh chopped basil and dollop of red pepper spread.

I store the hash (sans eggs and basil) in tupperware in the fridge, then cook eggs before serving myself a bowl.  It lasts me about 4-6 servings.


Want to know how it tastes?  Click HERE to see a review of this dish by my extremely critical (and extremely bald) friend, Jeremy.


Tuesday, October 1, 2013

Coriander and Cumin-Crusted Pork Tenderloin with Parsnips

Pork tenderloin is a wonderful cut of meat, especially as leftovers.  Even after reheating, the meat stays moist and tender.  The flavors in this dish are simple but very satisfying.  It's one of the few dishes I make that require little prep and active cooking time.  This meal is also a great way to introduce a new vegetable to your family - parsnips.  A relatively neutral root vegetable, parsnips are a great carrier of flavors.  My favorite element of this dish is the orange segments.  After cooking with the pork and parsnips, their sweetness is replaced by a savory note and has a great complementary texture.  This recipe is straight out the cookbook, Practical Paleo - a great resource for anybody new to the diet.


Just look at that perfectly browned spice crust

Prep time: 15 minutes

Active cooking time: 10 minutes
Inactive cooking time: 1 hour

Equipment needed:

large skillet
13x9 roasting pan

Ingredients:

1 tbsp cumin
1 tbsp coriander
1 tbsp garlic powder
1 tsp sea salt
pepper to taste
2 pork tenderloins
2 tbsp cooking fat
2 onions, sliced
4 parsnips, peeled and chopped
2 cloves garlic, minced
1 large orange, peeled and segmented
seeds of 1 pomegranate (approx. 1/4 cup)


Veggies, post-roast

Directions:

1. Preheat oven to 375°.
2. Combine all spices in a small bowl.
3. Pat pork tenderloins dry using paper towels and apply spice blend liberally to all sides.
4. Heat cooking fat in large skillet over medium-high heat and sear the tenderloins on all sides (approx. 2-3 minutes per side).
5. Add the onions, parsnips, orange segments and pomegranate seeds to the roasting pan and top with the seared tenderloins.  Cook in the oven for 30-40 minutes (when the internal temperature of the pork reaches 145°).  Remove the tenderloins and rest them, covered in foil.  Continue to cook the vegetables for another 10-15 minutes.
6. Slice the pork diagonally (on the bias) and serve with the vegetables.


Ta-da!

Happy nomming!

Sunday, July 21, 2013

Primal Chocolate Chip Cookies

I miss cookies.  I was never much of a cake person, but I STILL always find it nearly impossible to turn down a good-looking cookie.  I tried several different paleo cookie recipes before finally finding the perfect cookie for me.  I think the trouble I was having with all of the paleo cookies I was making was the fact that they were all TRYING to be regular, wheat-laden cookies - trying to replicate the texture and sponginess of a traditional cookie.  The recipe that finally convinced me that paleo could make a good cookie was from Mark Sisson.  The trick is that it's not a paleo cookie - it's a paleo VERSION of a cookie.  It embraces the crunch of the nuts that form the cookie's base and doesn't try to replicate the texture of gluten (which, honestly, can't really be done to any satisfying degree).  Based in the toasted flavor of walnuts and pecans, and topped off with the deep, unique flavor of dark chocolate, this cookie is hugely satisfying and a lot more nutritious (and filling!) than a traditional cookie.

Cookware:
1 cookie sheet
1 food processor

Ingredients:
4 dates, pitted
1 1/2 cup walnuts
1/2 cup pecans
1 tsp baking soda
1/8 tsp salt
2 tbsp coconut oil, melted
1 egg
1 tsp vanilla
1/4 cup unsweetened shredded coconut
1/2 cup (or less) dark chocolate chips

Directions:
1. Preheat your oven to 350°.
2. Process dates in your food processor until a paste forms (about 40 seconds).
3. Add walnuts and pecans and process for another 35 seconds (I go a little longer to chop the nuts a little finer - I prefer the finer texture as the base but I've thoroughly enjoyed them both ways)
4. Add baking soda and salt and pulse a few times.
5. With processor running, drizzle in liquified coconut oil, egg and vanilla.  Stop the processor as soon as everything is incorporated.
6. Remove batter to large mixing bowl.  Stir in shredded coconut and chocolate chips (using a big spoon or your hands).
7. Portion out 12 cookies and flatten slightly (you may also want to round out the cracked edges of the cookies)
8. Bake for 15 minutes or until the edges are browned.


Now, if you'll excuse me, I'm off to whip up a batch of these right now - because just writing about them has given me a serious hankerin'.  Happy baking!

Ginger Carrot Soup

I freaking LOVE ginger.  I'm sure that's no surprise to you, considering so many of my recipes have ginger front and center (Moroccan Chicken Casserole, Roasted Cashew-Covered Broccoli, Chicken Tikka Masala).  It's a powerhouse spice that I just adore in all forms.  I also sometimes get a little bored chowing down on fibrous veggies all the time - so it's nice to be able to make something OUT OF the vegetables that provides a different texture and mouthfeel to my meal (both important aspects of a satisfying meal, along with flavor and aroma, of course).  It takes a little time, but very little effort, to make this delicious side dish.

Cookware:

stockpot with lid
a blender (or food processor)

Ingredients:

3 tbsp coconut oil
1/2 large yellow onion, diced
1/4 cup fresh ginger, finely chopped*
4 cups carrots, peeled and chopped (approx. 1 1/2 lbs)
3 cups vegetable broth
1 1/2 cups orange juice (freshly squeezed is best; this is what I would call the "secret ingredient" of this soup)
dash nutmeg
salt and pepper, to taste

*My friend who first introduced me to this soup (Hi Renee!!), leaves the thin, papery skin on the ginger when cooking it.  I was completely put off by this but happily admit that the skins did not add any unwanted flavor to the final product and even added a rustic element.  Despite this admission, I still always peel my ginger - 'cause my Mama raised me right.

Directions:
1. Heat the coconut oil in your stockpot over medium high heat.  Add your onions and ginger and saute until onions are soft (about 5 minutes).
2. Add carrots and vegetable broth and reduce heat to medium.  Simmer for about 40 minutes or until carrots are soft.  Add orange juice and remove from heat.
3.  Working in stages, puree the simmered ingredients in your blender.
4.  Stir in nutmeg, salt and pepper and serve.

Crazy simple, right?  And the final result is a wonderfully sweet, (carrot), spicy (ginger) and tart (orange juice) soup that's refreshing and satisfying.  Oh, and just in case anyone was wondering, this recipe is 100% vegan as well.


No picture?!  I suck.

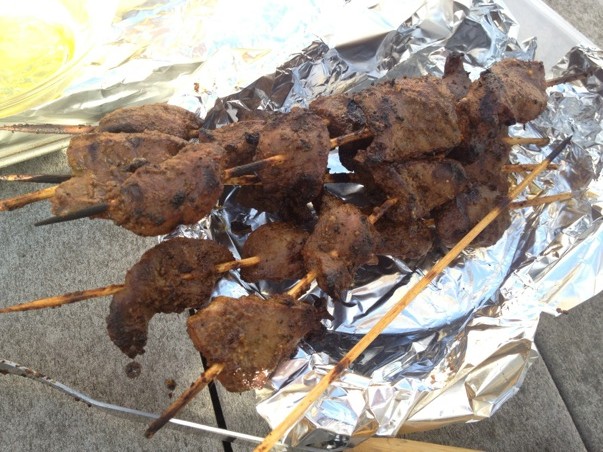
Peruvian Anticuchos

I must admit - one of the most exciting culinary experiences about eating primal is cooking with new proteins - namely offal.  So far, in my kitchen, I have cooked beef tongue, beef heart, marrow bones, and chicken livers.  The nutrient profile of beef heart is stunning: vitamin B6, Vitamin B12, niacin, riboflavin, thiamin, selenium, and iron, to name a few. The “iron” taste usually wears off after the first bite or so and the marinade makes these beef kebabs almost irresistible. A good local butcher or vendor at a farmer’s market should have heart, most likely already butchered.  This recipe is for .7 lb of butchered heart meat (no fat, gristle, etc.); it yields about 4 small servings.  If you have any leftovers, refrigerate and enjoy cold the next day.

Cookware:
mini food processor (or blender)
charcoal (or gas) grill
basting brush
8 bamboo skewers

Ingredients:
1 butchered beef heart (approx. .7 lbs; cut into 1-inch pieces)
½ cup red wine vinegar
2 tbsp ground cumin
½ tsp black pepper
½ tsp salt
3 garlic cloves
1 tbsp fresh parsley
1 tbsp fresh cilantro
2 dried chiles* (available at any Mexican grocery or ethnic foods aisle of your local supermarket)
¼ cup + ½ cup olive oil


*There are a great variety of chiles out there (Ancho, Guajillo, Pasilla, Arbol) so it really depends on your personal preference.  I tend to use different chiles every time I make this dish - so the marinade comes out a little different each time


Marinated and ready for the grill!


Directions:
1. Soak the chiles in hot water until soft (anywhere from 15-30 minutes, depending).  Cut the chiles open, de-seed and de-vein them (you may want to use gloves because the sting of the pepper will stay on your hands for awhile).
2. In your food processor, mix the chiles, ¼ cup of the olive oil, and the rest of the ingredients until a paste forms.
3. Combine heart pieces and marinade in a ziploc bag (or other closed container), and refrigerate for 30 minutes.  Do not marinate them for much longer because the vinegar will dry out the meat.
4. While the heart is marinating, soak at least 8 thick bamboo skewers in water and start your grill.  Make sure the coals are very hot before you add your meat (so you can get a nice char on the kebabs).
5. When the heart is done marinating, add 3 or 4 pieces to each skewer.  Make sure to arrange them so that the meat will lay flat on the grill.  Save the leftover marinade.
6. Add the remaining ½ cup of oil to the reserved marinade and set aside.
7. Before adding skewers to the grill, baste with the reserved marinade.  Make sure the basted side always ends up face down on the grill (since the original marinade had raw meat in it).  Grill for about 2 minutes per side.  Make sure not to overcook them because the heart will dry out and become tough.


Mmm...kebabs

This really is the perfect recipe if you're curious about offal but timid about diving in too deep.  The recipe is simple and because the heart is an organ comprised mostly of muscle - it still has that familiar texture of the meat we're used to eating.  When marinated properly, it tastes like the most tender prime cut of steak.  And while you've got the grill going, feel free to grill up some summer squash or sweet potato slices to serve alongside this flavorful protein.  I hope you give these kebabs a try this summer.  Happy cooking!